
Getting started with Templates
Introducing Templates
SMTP2GO allows you to create and programmatically use various email templates when sending via the API. Email templates are in HTML (with a Plain Text version automatically generated) and can contain variables that can be dynamically supplied when sending, allowing the sender to personalise emails easily.
The “Settings > Templates“ section in the App provides the ability to create, edit, test and preview your own templates or choose from a variety of existing email templates to use out of the box.
This guide takes you through the setup of a template via the SMTP2GO App and then how to send via the API.
If you wish to manage templates via the API, the relevant endpoints include:
- /template/add Adds a new email template that you can use to format your emails.
- /template/edit Changes details of an existing email template.
- /template/delete Deletes the specified email template.
- /template/search Searches your collection of email templates. Returns any templates that match your search criteria.
- /template/view Returns details of the email template with the specified ID.
Create a Template
Navigate to the “Settings > Templates” section of the App.
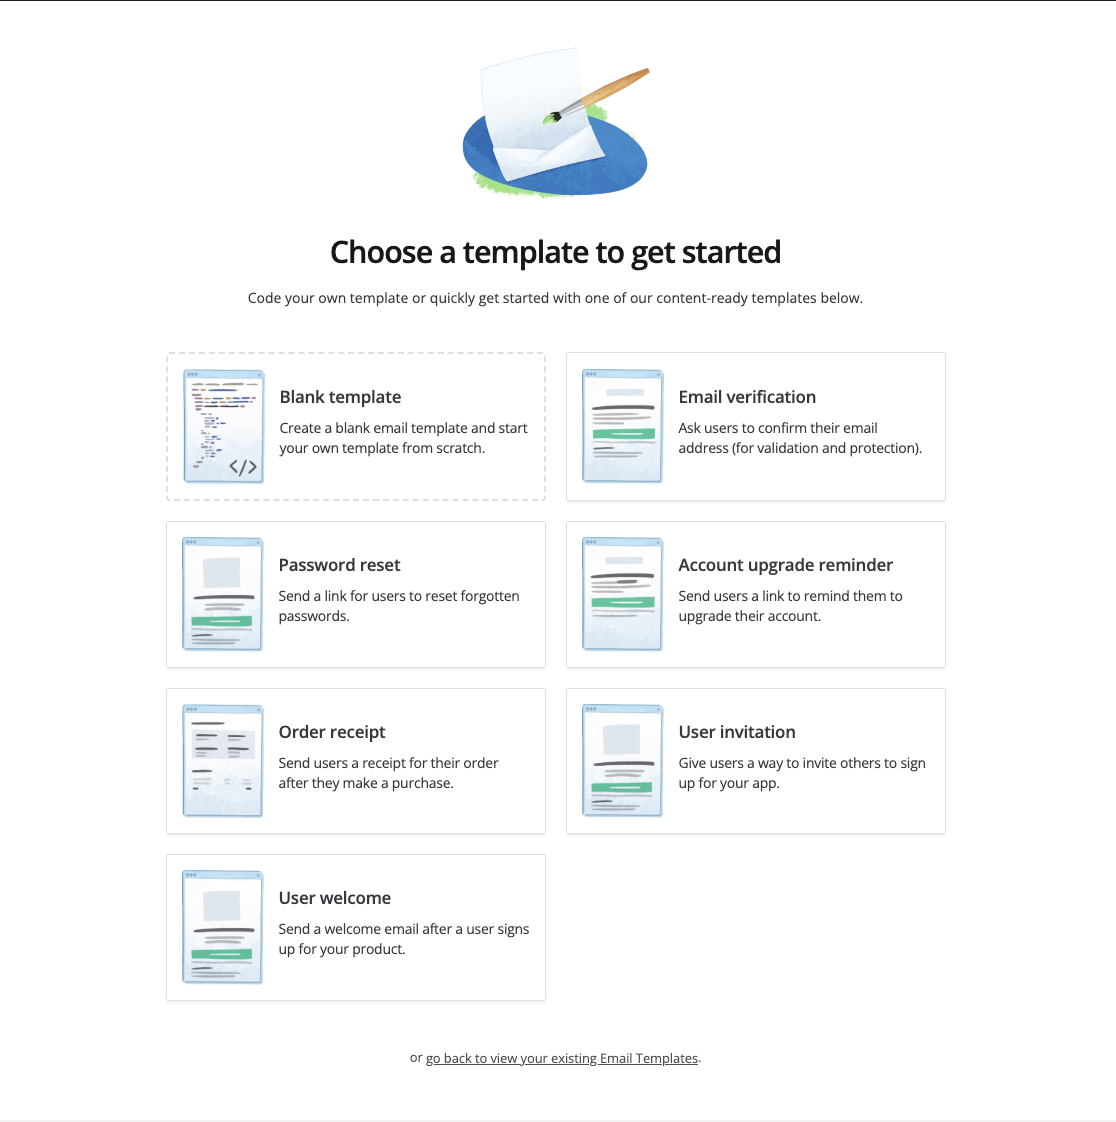
To add a new template, click the “Add email template” button and you’ll be presented with pre-made templates that can be customised, or the option to start with a blank template to create your own.
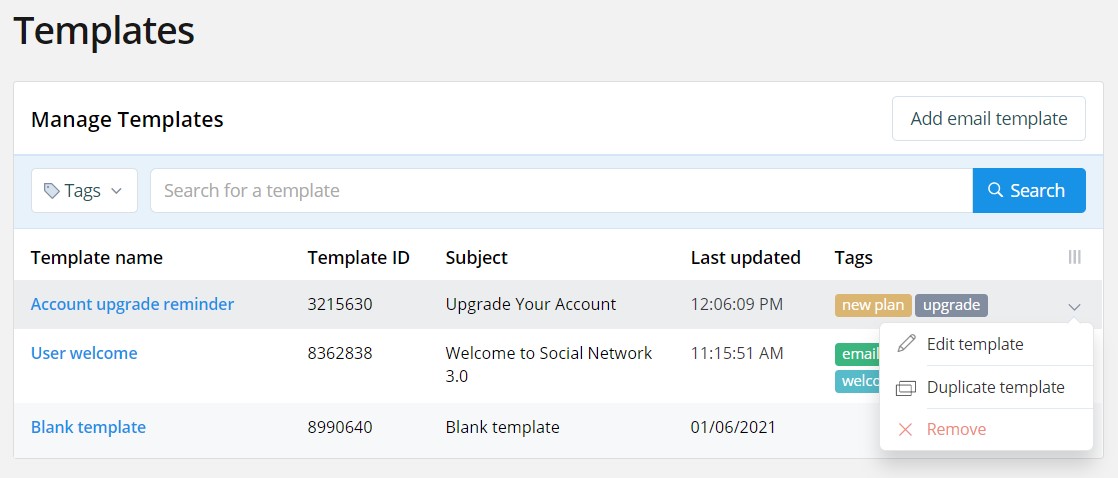
If you have existing templates, to edit them you you can click on the specific template name or go to the drop-down menu on the right side of the template list and choose “Edit template”.
In this guide, we'll use the User welcome template. To follow this guide, choose this template from the list.
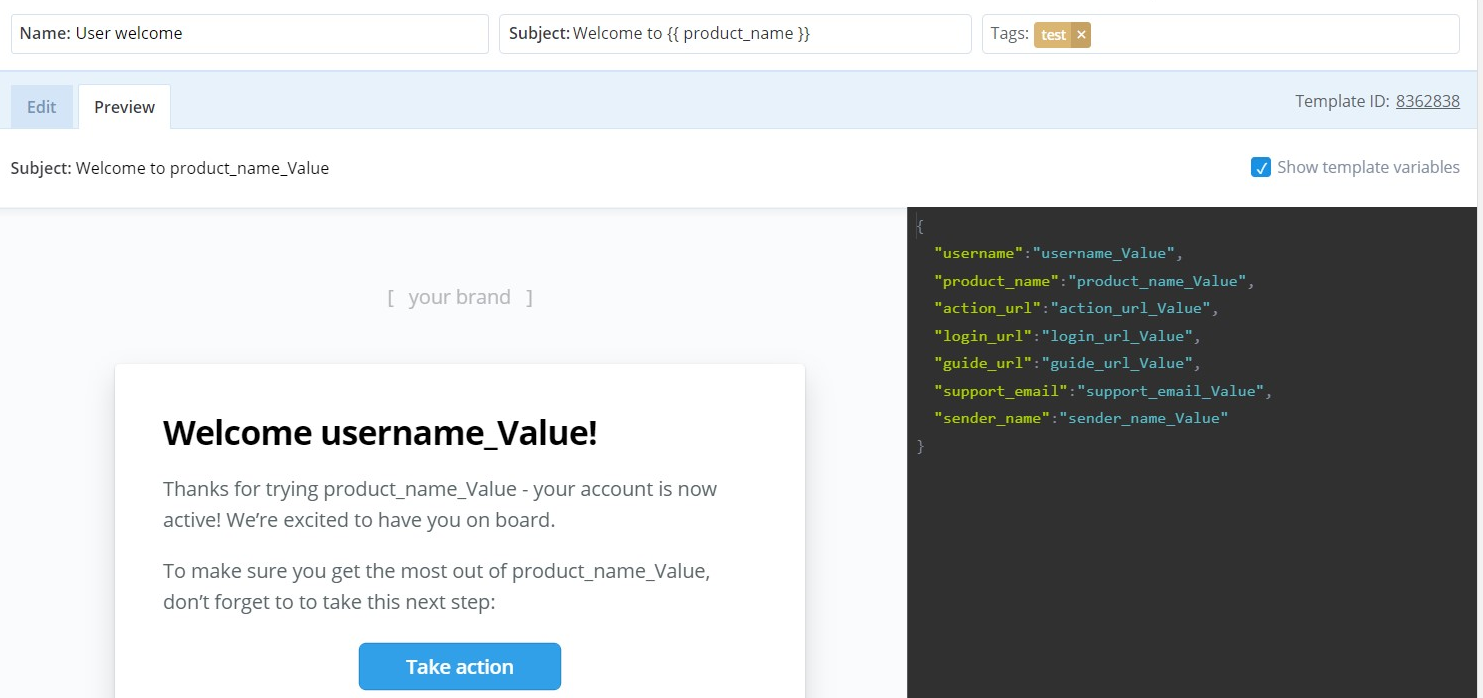
Start by setting a friendly "Name" for your template, and then the "Subject" of the email as it will appear in the recipient's inbox.
The "Edit" tab allows you to edit the HTML and you can also select to view the Plain Text version (this is automatically generated from the HTML code and is not editable in that view).
The "Preview" tab will show the email template as your recipient will see it.
On the right-hand side, a "Show Template Variables" option allows you to define the variables for the email and then in your API call, you can set these for each recipient.
NoteThe Plain Text version is auto-generated from the HTML Code tab.
When editing the HTML, encapsulate variables inside two braces:
{{ variable_name }}The User welcome template first introduces variables with a username field:
<h1 class="template-email-title">
     <!--[if mso]><span style="font-family: sans-serif;"><![endif]-->
         Welcome {{ username }}!
		 <!--[if mso]></span><![endif]-->
</h1>
HandleBarsJS
HandleBarsJS is supported in templates. It uses a template and an input object to generate HTML or other text formats. Further information can be found in our Templates knowledgebase article.
Preview, Save and Test
Customise the email and use the ‘Preview” tab to view the email so you can ensure it looks good.
Once you have finished editing, click the "Save Template" button towards the bottom of the screen to add it to the template list. Once the template is saved, the “Send Test” button is enabled which allows you to send a copy of the template to a desired recipient to test the email. The From address you set must be a verified sender in your account.
By default, you'll find code snippets in cURL, Python and Go, but many more options are available to view in the Send a standard email documentation.
Ensure your sender address is validEnter an email address that your account is authorised to send from (an email address from a verified sender).
NoteSending test emails will count against your email allowance.
Send a templated email with the API
As mentioned above, though this guide uses cURL for examples, a wide number of options from C++, to Javascript, Node and more can be accessed throughout our API Reference Documentation.
curl --request POST \
     --url https://api.smtp2go.com/v3/email/send \
     --header 'Content-Type: application/json' \
     --header 'X-Smtp2go-Api-Key: api-xxxxxxxxxxxxxxxxxxx' \
     --header 'accept: application/json' \
     --data '
{
  "sender": "[email protected]",
  "to": [
    "[email protected]"
  ],
  "version": 1,
  "template_id": "userwelcome",
  "template_data": {
    "username": "mikejasonsmith",
    "plan": "deluxe"
  }
}
'
Try it for yourself.
Success! Look out for a 200 OK responseSimilar to the below:
{
  "request_id": "44f1d836-d299-11ed-86ad-f23c9216bfec",
  "data": {
    "succeeded": 1,
    "failed": 0,
    "failures": \[],
    "email_id": "1pjXOz-9EGeSN-09"
  }
}
Updated about 2 months ago